Search This Blog

Saturday, October 6, 2018

Review: Jessicurl Spiralicious Styling Gel

I recently learned that the Jessicurl website offers free shipping on orders of $15 or more on the 15th of every month. There are multiple products from them that I’ve wanted to try and it turns out that they the offer half-ounce sample packets for $1.50 (plus one free with every order). This means that I could try a LOT of products for only $15. So, on the 15th of September I placed an order for samples of the Gentle Lather Shampoo, Hair Cleansing Cream, Aloeba Daily Conditioner, Too Shea! Extra Moisturizing Conditioner, Confident Coils Styling Solution, Rockin’ Ringlets Styling Potion, and Spiralicious Styling Gel. I opted for a two ounce bottle of the gel since, given how much I use per wash day, I figured I would need more than half an ounce to really decide if I liked it or not (I also got two sample packs of the Aloeba Conditioner). Reviews of the other products should be forthcoming, but today I want to talked about the Spiralicious gel.

Of all the Jessicurl products, I’ve heard about the Spiralicious Styling Gel the most by far. What really made me want to try it, however, is the fact that polyquaternium-69 is the second ingredient. PQ-69 is an absolute powerhouse when it comes to preventing frizz in humid climates as well as providing hold (click here for the Naturally Curly article on this awesome ingredient). It’s also the second ingredient in the gel I had been using previously, the Got2b Ultra Glued Invincible Styling Gel but, unfortunately, that product also has denatured alcohol as the sixth ingredient. I follow the CG method although I break the rules sometimes. Because my hair tends to be well-hydrated, drying alcohols aren’t necessarily a deal breaker for me as long as they aren’t one of the top ingredients and my hair seems to respond well to them. However, I still do my best to avoid drying alcohols and will favor a product without them (even if it’s more expensive) if it works just as well.

Speaking of PQ-89 and drying alcohols, let’s take a look at the full ingredients list for the Spiralicious Styling Gel. While I purchased this gel in the Citrus Lavender scent, this is the ingredient list for the unscented version so we can just look at the ingredients that are playing a non-fragrance role for the hair or product.

  1. Water 
  2. Polyquaternium-69 (humidity resistance and hold) 
  3. Hydroethylcellulose (a gelling and thickening agent) 
  4. Jojoba Seed Oil (emollient) 
  5. C12-15 Alkyl Benzoate (emollient and thickener) 
  6. Panthenol (AKA Vitamin B-5; humectant and conditioner) 
  7. Polyquaternium-11 (conditions and adds slip, body, and shine; can build up) 
  8. Diazolidinyl Urea (preservative) 
  9. Iodopropynyl Butlycarbamate (preservative) 
  10. Alcohol [Ethanol] (a component of PQ-69)

There are a few controversial ingredients on this list, most notably the ethanol. Jessicurl notes on their website that this gel contains around 0.7% ethanol, which is too low to cause dryness. You can’t have PQ-89 without a little bit of ethanol so this truly doesn’t worry me. Some may also be concerned about the preservatives on the list, diazolidinyl urea and iodopropynyl butylcarbamate. The former is a formaldehyde-releasing preservative, which is a term that will always spook people. According to the CIR (Cosmetic Ingredient Review) Expert Panel, as long as this ingredient makes up 0.2% or less of a cosmetic product (as it almost certainly is here), it is safe. Iodopropynyl butylcarbamate is only of concern because it can be an irritant. As this isn’t an aerosol product or something you’d rub into the scalp, I’m not personally concerned about it, but if you have a bad reaction to this product, you may be sensitive to this ingredient.

The real star ingredients, in my eyes, are polyquaternium-69, jojoba oil, panthenol, and polyquaternium-11. As I mentioned above, PQ-69 provides hold and humidity resistance but it’s structure also makes it easier to wash out of hair than some other polyquats, which is great news if you no-poo or low-poo. Jojoba oil is a non-penetrating oil that seals moisture into the hair shaft which makes it a welcome addition to a product you’re likely applying last in your routine. Panthenol attracts water and softens hair but it is not a sugar-alcohol humectant like glycerin or sorbitol, which means you aren’t going to run into issues of it frizzing the hair in high humidity or drying it out in low humidity. PQ-11 is another great polyquat that forms a film on the hair, thickening individual strands as well as adding slip and shine. If your hair is prone to build-up and if you water wash or no-poo only (meaning you don’t cleanse using any surfactants, including non-sulfate surfactants such as cocomidopropyl betaine or decyl glucoside) you may want to keep an eye out for build-up, since PQ-11 won’t simply rinse out of the hair with water.

The Jessicurl Spiralicious Styling Gel doesn’t look like your typical hard hold gel, which I generally think of as being clear. Instead it’s white and a little runny. The hold is pretty strong although, unsurprisingly, not as strong as the Got2b Ultra Glued’s crazy hold. This makes sense because the Spiralicious has PQ-69 as its only hold ingredient whereas the Ultra Glued also has PVP and acrylates/steareth-20 methacrylate crosspolymer to bolster the hold. Unfortunately, those products are also prone to build-up which can be problematic for my low porosity hair.
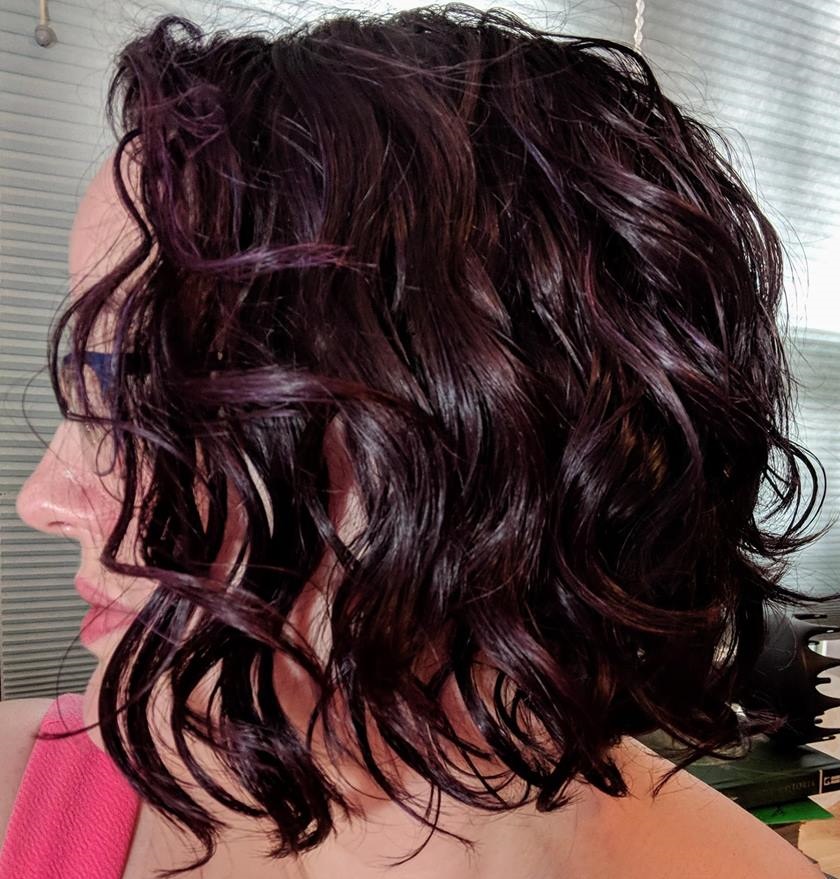
Spiralicious Only
For my first trial, I slotted the Spiralicious into my usual routine in place of the Ultra Glued. I scrunched somewhere between a nickel and quarter sized amount into my hair as my last styling product and concluded, once my hair dried, that I needed to use more. It didn’t knock out my frizz as much as I’m used to nor provide the hold I wanted. My waves ended up looking pretty limp on the second day.

For my next use, I used more than a quarter sized amount and got much more satisfactory results in the frizz department but it was still less hold than I wanted. Both times, the gel formed a slight cast that was easily scrunched out and left my hair soft and shiny, which I really enjoyed. My type 2 waves need more hold but I imagine that the Spiralicious on it’s own would be fantastic for those with type 3 curls. I found my hair’s personal sweet spot when I mixed the same, more-generous portion of the Spiralicious with a pea sized amount of the Ultra Glued. I cocktailed the two by mixing them in my hands and then scrunching the mixture into my hair. This gave me some more hold (and more crunch, which I like in a gel) but still left my waves touchable and with a healthy looking sheen.
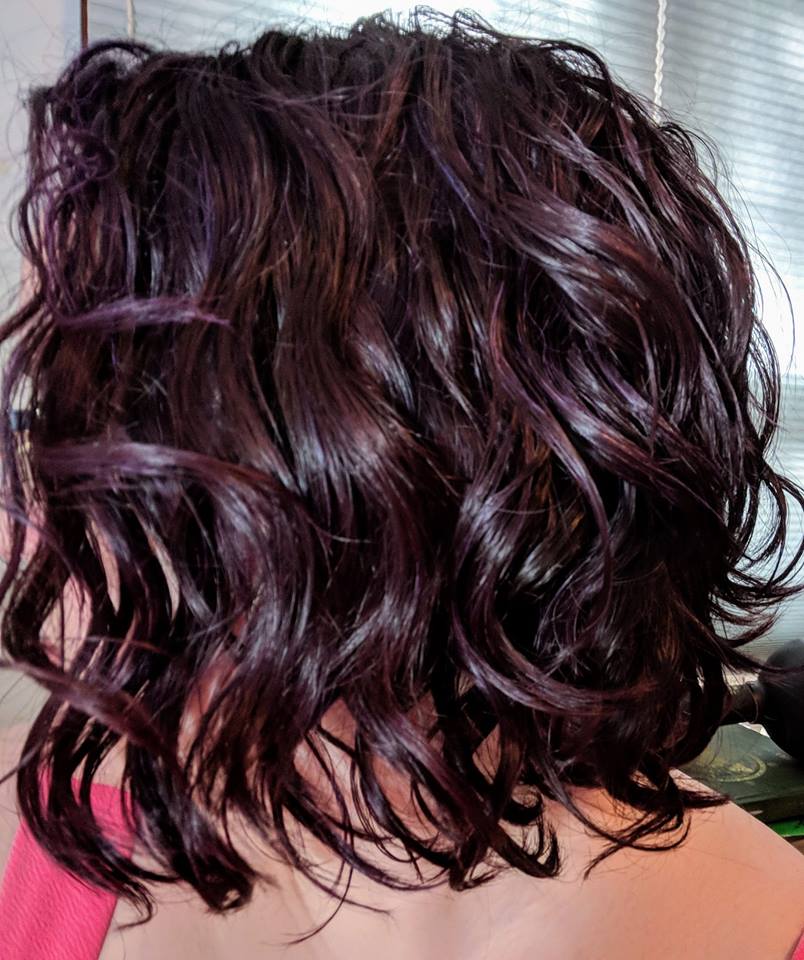
Spiralicious and Ultra Glued

Curl enhancement and definition are always my top priorities in a styling product. The Spiralicious gel isn’t curl enhancing but that isn’t really the job of hard hold gel, at least not in my routine. What it does extremely well, however, is give great definition. It seems to help my hair clump PERFECTLY: not so big that I’ve lost all my volume, and not so small that my waves look stringy. I just end up with these abundant, plump and juicy waves and curls and that is, ultimately, my favorite thing about this product.

I get nice second day hair with my Spiralicious/Ultra Glued cocktail and even decent third day hair, which used to just not be a thing for me. I still lose some curl on days two and three which is essentially unavoidable. However, I’m able to refresh pretty easily and get some more curl back if I feel like it. Perhaps most importantly, the frizz-fighting/humidity resistance effect seems to last which makes refreshing easier.

Personally I don’t mind that I have to use the Spiralicious with a second gel and I honestly feel like the combination of the two is greater than the sum of its parts. I understand, however, that some people want a styler to work on its own. If you’re one of them and you need that crazy, ultra-hold, this may not be the product for you. However, I still feel like it meets the qualifications for a hard hold gel, it just isn’t the hardest on the market.

I also want to mention that the citrus lavender scent is completely amazing. This is quite possibly my favorite scent for a hair product EVER. I don’t notice it lingering strongly in the hair but I also use a lot of other products and the scents could be competing. The citrus lavender scent comes from essential oils (lavender, sweet orange, and grapefruit) which can be a good or a bad thing, depending on your preference. If you have an allergy to any of those three plants, this scent is not the way to go. Jessicurl also offers two other options: unscented and a scent achieved through artificial fragrance, called “Island Fantasy.” Believe it or not, artificial fragrances are less likely to cause allergic reactions because they’ve been specifically formulated with that goal in mind. Regardless, between the three choices there should a good option for everyone. All three scent options are available for every product in their line, too, not just the Spiralicious gel.

I will definitely be purchasing a full size of the Jessicurl Spiralicious Styling Gel when my 2 oz bottle runs out and I already consider it a holy grail. I recommend this for anyone who likes medium to strong hold without excessive crunch or in combination with a stronger hold gel like the Got2b Ultra Glued for those of us who are all about that crazy hold, super-crunch life.

Friday, September 28, 2018

The Nerdy Curl Guide to Finding Your Perfect* Curly Hair Routine Part 2a*: Cleansing, Conditioning, and Detangling Techniques

*As I was writing this post it became clear that it was going to be much longer than I had originally intended. That’s why this is Part 2a instead of just Part 2. Part 2b will cover styling, drying, and style preservation techniques.

Welcome back to my guide to customizing your perfect curly hair routine (you can check out Part 1 here). Today, we’re going to be talking about the techniques you use for every step of your wash day. I chose to approach techniques before products because the techniques you choose to try can sometimes dictate what types of products you'll use.

A significant choice I recommend before examining other techniques is deciding if you are going to follow the Curly Girl Method or not. The CG method basically comes down to a philosophy of embracing your natural texture and making your hair as healthy as possible. This involves giving up sulfates, silicones, and drying alcohols in hair products and refraining from heat styling. I recommend reading Lorraine Massey's book, The Curly Girl Handbook (which can be found at your local bookstore, in the Naturally Curly shop, or from major retailers like Amazon or Barnes & Noble). It has good information for all curlies, even if you opt not to follow the CG method.

Another curly hair care method is the Tightly Curly Method which is, you guessed it, geared toward those with tight curls. It’s sometimes described as being the Curly Girl Method but with sulfates and silicones. The book on the Tightly Curly method, Curly Like Me by Teri LaFlesh, can be purchased through Amazon (just make sure purchase by clicking the link on TightlyCurly.com rather than searching on Amazon itself. This supports the site that provides so much excellent info for free). I’m sure there are other philosophies of curly hair care, but these are the big two that I know of.

After you've decided if you're following a method or not, it’s time to look at individual techniques. For each step, I've listed some of the most commonly used techniques, who generally tends to favor them, and, to the best of my knowledge, why. Remember that your mileage may vary and that some experimentation will inevitably still be required. This information is merely a starting place to help you make the best possible educated guess about what will work for you and your hair.

Cleansing


The biggest question to tackle when thinking about cleansing is how often to wash your hair. Most people with textured hair opt to wash their hair less often than once a day. There are a couple reasons for this. The first is that over-cleansing can be very drying to textured hair, which is already more likely to start out dry. This is because the structure of textured hair makes the cuticle more vulnerable to damage. The twisting shape also makes it more difficult for sebum (the natural oil produced by the body) from the scalp to travel all the way down the hair shaft to the ends. This brings me to the second reason curlies tend not to wash their hair every day, which is that it simply isn’t necessary the way it can be for straight hair, which can get limp and greasy from sebum much more easily. Given how involved wash day can get for those with textured hair, why do it every day if it isn’t necessary?

So, how often should you wash your hair? It, of course, comes down to your preferences. However, if you’re unsure, a good place to start is two to three times a week if your hair is wavy (type 2), if you have an oily scalp, or if you sweat a lot (whether this is due to climate or exercise). If your hair is curly (type 3) consider washing once a week. If your hair is coily and/or kinky (type 4) or if you have especially dry hair, you may prefer to cleanse more infrequently, perhaps once every two weeks. A good plan is simply to be mindful of your hair and scalp and wait until they feel like they need to be washed. Limp, greasy hair or an itchy scalp are good indicators. If you are accustomed to washing your hair every day and switching to two or three times a week is too drastic a change for you, simply start by washing your hair every other day.

Conditioning


Everyone seems to agree on how much conditioner is best to use: enough to make your hair feel like wet seaweed. This means you’ve saturated it with the maximum amount of water and conditioner it can hold and also have enough slip for detangling. However preferences of where to apply conditioner and how much to rinse out vary. If you have fine hair, a looser curl pattern, an oily scalp or a desire for more volume around the crown (and your hair isn’t overly dehydrated), consider applying conditioner from the ears down. If you have dry, high porosity, consider applying conditioner all the way to the root. Those with adequately moisturized, fine, wavy, or otherwise easily weighed down hair generally prefer to rinse out all their conditioner. Those with dry and/or high porosity hair generally prefer to leave some, most, or even all of their conditioner in.

In my opinion, though, absolutely everyone should use the Squish to Condish technique, which was invented by hair stylist Melissa Stites. This is because, regardless of your hair type, this technique will help ensure that every strand is optimally hydrated ensure full coverage of your conditioner (for more info on why and how this works, check out this blog post). The Squish to Condish technique involves further wetting the hair when it is soaked and full of conditioner (remember, that seaweed texture is key) and catching the water and conditioner mix into cupped hands as it drips off your curls. I like to do this with my head upside down by ducking quickly under the shower head (with the pressure turned down low) and then out again. Lower your curls into the water/conditioner cupped in your hands and squish it using a gentle scrunching motion, almost like you’re massaging the water into your strands. It should make a “squishy” sound. Continue with each section of hair. You can use this as your only method of rinsing and simply continue until the amount of conditioner you leave in is all that remains or you can rinse after squishing.

Some people swear by rinsing their hair with cold water in order to “close” the cuticle. There’s actually very little scientific evidence to support this claim. However, it does appear that very warm water can temporarily slightly increase porosity. This is a good thing for those with low porosity hair who struggle to moisturize their strands. However, it can be drying to porous hair. So, while there doesn’t appear to be much benefit to rinsing your hair with ice cold water, you may want to stick to cooler, room temperature water if you have high porosity. It should also be noted that warm water helps to remove dirt and oil from the hair, so you may want to vary your shower temperature depending on whether you’re cleansing or rinsing out conditioner.

Detangling


Believe it or not, brushing your hair while it’s dry can damage it. To limit damage, textured hair should be detangled in one of two states: saturated with water and conditioner or dry BUT coated in your favorite natural oil (I use coconut oil). What these states have in common is lubrication which helps both to loosen knots and help detangling tools to glide more easily through the hair. Properly hydrated hair is also more flexible, so if your hair is brittle or damaged it’s probably better to detangle wet with conditioner.

The three main tools used for detangling are fingers, a wide tooth comb, and brushes with flexible bristles such as a Tangle Teezer or a Wet Brush. Finger detangling is the gentlest option because you feel every knot you encounter and are less likely to rip through them. This is a good option if your hair is delicate, brittle, or damaged. A wide tooth comb is also fairly gentle but generally detangles faster than finger combing. They work wear for tangle-prone hair that is fairly healthy and not delicate. A Tangle Teezer or similar brush can help ensure that you’ve worked through every knot but you may want to avoid these if your hair is particularly damaged. Personally, I like to finger detangle first and then use a brush to check for small knots and to align my hairs.

No matter what you use to detangle, the key to detangling without damage is patience. When you hit a knot, gently undo it, adding more lubrication (oil or conditioner, whichever you’re using) if you need to. Never, ever rip through knots. You can prevent the number of tangles that your hair develops by protecting your hair while you sleep with a satin bonnet, silk or satin pillowcase, or both.

That’s it for today! In the next update of this series I’m going to talk about styling techniques.

Monday, September 24, 2018

Further Adventures in Curl Chemistry

After my homemade hair gel fail last week, I promised to get back to you about my second attempt. Since then, I have done my hair three times and feel confident enough in my preliminary findings to share them.

After using the gel on two consecutive wash days, I opted to skip it on the third (today) so I could see if it really seemed to make a difference or not. In these two photos I styled my hair using all the same products and techniques except that I’ve used the flax seed gel in the top photo and skipped it in the bottom photo.

With gel: a little halo frizz but shiny, defined waves.
My primary goal for this gel was curl enhancement but I don’t think it honestly made that much of a difference in my curl pattern. Flax and aloe are supposed to be somewhat curl enhancing but magnesium sulfate is the heavy hitter in that category. It can also be drying, so I was fairly conservative in the amount I put into the gel (½ tsp in 1 cup of gel). I may experiment with adding a little bit more in the future to see if I can get more curl enhancement while still keeping my hair hydrated.

The bottom picture (without the gel) actually seems a bit curlier at first glance but in reality it's more that the waves are going off in random directions. I like my hair to look a little messed up and fun but this is a little crazier than I like it.
I first noticed the difference when I diffused my hair. When I used the gel, my hair looked normal coming out of the diffuser. Without the gel, my curls seemed to be setting into that crazier pattern. I'm not certain what the reason behind that is, but I noticed it so I mentioned it.

Without gel: crazy waves and frizzy bits sticking out
So, basically, the big difference was in definition and frizz. Even while my hair was still damp it seemed ready to frizz up without the flax seed gel. The issue was less about halo frizz (which I tend to associate with humidity) or losing definition to fuzzy strands (which happens when I use glycerin) and more about random strands breaking off from their curl clump to stick in a random direction. Also, as the day has worn on my hair has been losing hold and frizzing up more on me.

My hair also felt more well moisturized when I used the gel, which makes sense with the frizz reduction. I think both factors can be attributed to the film forming humectants in the gel, flax seeds, aloe vera gel, and xanthan gum.. My hair doesn’t get along well with humectants like glycerin, propylene glycol, sorbitol or other sugar alcohols, at least not when the humidity is high (which is much of the time where I live). Film forming humectants work not only by attracting moisture but also by sealing the hair (with a film, hence the name) which slows the loss of that moisture. Proteins are also film-forming humectants but, as was made clear by my previous attempt, my hair doesn’t get along with gelatin and I didn’t want to risk trying a different protein just yet.

Overall, it's not like I hate my hair without the flax seed gel; I just feel like my hair looks prettier with it. Mostly it's nitpicking little details that other people are far less likely to notice than I am. However, I notice enough of a difference to make using the gel worth it to me. In the future I may experiment with adding more magnesium sulfate or trying a different protein, but I'm pretty happy with the formula as it stands.

There are a few disadvantages to using this gel that I should mention. The first is the smell. Although I tried to improve the scent with a little vanilla extract, this was largely unsuccessful. I can sense a hint of vanilla but the flax seed smell easily overwhelms it. It may be that I could mask it if I was willing to drop some coin on essential oils but I don’t think I really care that much. The scent does not linger on the hair, or at least it doesn’t when used with my other products. It also doesn’t provide the nicest tactile experience. It has...well, a snot-like consistency, if I’m being honest. This isn’t a deal breaker for me but I know that weird textures can really ick some people out.

It's not exactly appealing to look at, either...

Lastly, since this is a homemade item without preservatives, it must be kept refrigerated and has a shelf life of about two weeks. More than once with these homemade gels I’ve gotten out of the shower only to realize I forgot to pull my gel from the fridge. This means wrapping up in a towel with wet hair, trooping downstairs to the fridge and back up again. I like to apply my products on sopping wet hair, so this means I’m either trying not to drip all over the house or I’m squeezing the excess water out of my hair, fetching the gel, and then having to rewet my hair in the sink to style it. This is also a labor intensive process to repeat every two weeks. That has a pretty easy fix, though. Once I have the formula tweaked to my liking, I can just make a larger batch and freeze the excess. I already think that one cup of gel for two weeks is way more than I need, so I may even be able to get a whole month out of a single batch.

If you want to make your own flax seed gel, here's the recipe I used from the Science-y Hair Blog. I chose the custom options of adding aloe vera juice/gel (food grade), xanthan gum, argan oil, and magnesium sulfate (not listed on that recipe; I used 1/2 tsp). I also added five drops of vanilla extract but I don't feel like that was very successful, so I don't recommend it.

Tuesday, September 18, 2018

(Mis)Adventures in Curl Chemistry

Sometimes you take a risk and it really pays off. Sometimes you take a risk and have to wash, style, and dry your hair twice in one day.

Yesterday was the latter. I’m exhausted.

So, you will hear me talk about the Science-y Hair Blog over and over because it is my favorite resource for in depth info about hair. It just so happens that it also has a number of recipes for homemade hair products. I tried the Flax-Free Hair Gel using just water, xanthan gum, and argan oil. While I liked it, the texture was very runny and I wanted to see if I could get more curl enhancement. So, back to Whole Foods I went. I was considering getting guar gum but a bag of whole flax seeds was only about $3 while the package of guar gum was more like $10. Using flax seeds means straining but your girl is on a budget here, so I figured it was worth the extra work to save $7.

Making the gel itself was a little more time intensive than the flax-free gel (especially since I opted to soak the flax seeds overnight) but it wasn’t too bad. I did end up using a metal strainer and pantyhose to fully strain the gel out of the seeds. However, I think I didn’t use enough water, so I may be able to skip the pantyhose next time.

If you want to create your own flax seed gel, check out the recipe I used here. One of the things I like so much about this recipe is all the options to customize it. I ended up adding aloe vera juice, argan oil, xanthan gum, magnesium sulfate (AKA epsom salts-- she doesn’t list a suggested amount in this recipe but she recommends ½ tsp in the comments section of her flax-free gel recipe, which is what I used), and gelatin. It’s the gelatin that ended up being my (figuratively) fatal mistake.

If you aren’t familiar, gelatin is a type of protein. Specifically, it is partially hydrolyzed collagen. This means it contains medium to large protein constituents, making it hydrating and film forming. This film can help give strands structure and, in turn, encourage curl. I have low porosity hair but it isn’t completely protein intolerant. I’ve had success with products containing protein, like the Shea Moisture Curl Enhancing Smoothie, so I figured I’d give it a shot.


DIY "soft hood" AKA plastic bag held on by Buff
Yesterday was my day to clarify and deep condition my hair (I clarify once every 4-6 weeks and deep condition once a week). I used Suave Daily Clarifying Shampoo and the Hask Argan Oil Repairing Deep Conditioner. I’ve used both before, but it’s probably worth noting that the deep conditioner has a number of proteins in it, albeit lower on the list than the main moisturizing and conditioning ingredients. Because my hair is lower porosity, I generally need to leave masks on longer than recommended and apply heat. I ended up leaving the mask in for around 45 minutes using a makeshift soft-hood (see pics for this glamorous hair tool) for around 30 of those.


The "soft hood" inflated...hey, it works, ok?


When I did the squish-to-condish method and rinsed out the deep treatment, my hair felt soft and moisturized. However, it’s possible that the protein in the deep treatment was the maximum my hair could deal with. This may have led to or contributed to my issues later on.

I applied my products as normal, using a small amount of the flax seed gel (two dimes worth, maybe?). I’m still getting used to my short hair (this was only my second wash day after getting it cut) so I’m still working out how much product to use in my hair. I then plopped my hair for about 15 minutes.

My hair looked pretty normal coming out of its plop but as it was drying it started to look worse and worse. My waves were getting frizzier as they dried. My hair looked limp. I couldn’t stop myself from messing with my hair, which is a curly cardinal sin and which I KNOW couldn’t have helped matters in the frizz department. I just kept hoping that, if I re-wet certain strands, added a little DevaCurl foam, and finger curled them (my usual fix for wonky curls) it would magically get better. All those strands re-frizzed, though. I diffused when my hair was about 50% dry, upside down, as normal. When I came back up, my hair all over the place. Comically lifted straight off my scalp in irregular shapes. I love me some volume, but this was insanity.

Finally, when my hair was completely dry, it felt DISGUSTING. It was coated and stiff, just as I’ve heard protein overload described. There wasn’t really much a “crunch” to scrunch out, which seemed extra weird to me because I applied my hard hold gel (Got2b Ultra Glued Invincible Styling Gel) after the flax gel. I considered putting up with it for the rest of the day and just pulling it off my face with a Buff. After an hour of this, though, I decided it was just too yucky.

So, back into my bathroom I went. I washed and conditioned with my normal sulfate-free shampoo (Shea Moisture Superfruit & Coconut Water Weightless Shampoo) and conditioner (Shea Moisture 100% Virgin Coconut Oil Conditioner) under the tub faucet and styled my hair, skipping the flax gel, of course. I let it air dry halfway again, diffused until mostly dry, and let it air dry the last 10%. I was exhausted, but at least my hair looked (and felt) normal.

While this was an exhausting exercise, I think that I learned a lot. Gelatin, it seems, is probably not a protein my hair is going to get along well with. It’s possible that, if other factors had been different, that my hair would have been ok with the gelatin...but I doubt it. It makes sense to me that my lower porosity hair gets way too coated with a film forming protein. In the future, I’m going to stick to low amounts of protein with a lower molecular weight. I also noticed that, while I always have the urge to touch my hair when it’s damp (don’t we all?), the urge was so much stronger after the first wash than the second. Even before it was totally dry that first time, I could tell that something was off and I felt compelled to fix it. This could be a good red flag for me to watch for in the future, since I was kind of in denial about how bad it was until my hair had fully dried that first time.

I made a new batch of flax gel today, nearly identical to the first, just without gelatin (I also added a few drops of vanilla extract to see if I could make it smell a little nicer. The jury’s still out on that). I’ll give an update when I’ve had a chance to give it a try next wash day (probably Friday). What about you guys? Have you ever made flax seed gel at home? Have you ever had any epic DIY hair product fails?

Saturday, September 15, 2018

The Nerdy Curl Guide to Finding Your Perfect* Curly Hair Routine Part 1: Introduction and Self-Knowledge

*Ok, "perfect" might be stretching it a bit. “As ideal as possible” doesn’t have the same ring to it, though.

When you have curly hair (which I use as a term to cover the whole spectrum from loose 2a waves to 4c kinky curls and everything in between), finding the routine that works for you can be a daunting task. The online community is full of wash day routine videos, explanations of various techniques, product reviews, and a thousand different opinions of all of these…which occasionally seem completely contradictory. It makes a certain amount of sense because, as we hear and say often in the curly community, every curl is unique. But that doesn't make all these different opinions any less confusing. The common refrain is that it simply takes trial and error to figure out what works for you and your hair. While this is an inescapable fact, I wanted to find the best way to develop a stellar hair routine customized to me without trying every curly hair product or technique under the sun.

This series comes out of that experience. My hope is that I can take my curly hair self-education-- which was, honestly, done in a time consuming and meandering way-- and translate it into a more streamlined process for others. Don't get me wrong…this isn't an easy, quick-start guide to caring for your curly hair. That's available plenty of places, already, by people who are much better at being concise than I am. Certainly there are other ways to find or develop a hair routine that suits you just fine. But...c’mon. The blog is called “Nerdy Curl” not “Casual Curl” which means you can expect plenty of nerdy, nitty-gritty details every step of the way.

As with anything you read online, take the recommendations in this guide with a grain of salt. Not only is it possible that I’ve gotten something wrong (I am human and thus fallible) but everybody’s curls are different. The purpose here is not to give you a canned routine or tell you what you “should” do with your hair. Instead, the idea is to give you tools so that YOU can build your ideal routine because, in the end, nobody knows the unique hair on your head as well as you do.

This guide comes to you in five parts (I’ve never been known for my brevity) and is going to focus on developing your wash day routine. In addition to today’s post, we’ll cover choosing techniques, identifying your ideal ingredients, product selection, and the process of experimentation that is key to bringing the whole routine together. If there’s interest (or if I just feel like it) I may eventually add a post about developing a refresh routine. My goal is for this guide to be usable by anyone regardless of curl pattern, where they are in their hair journey, or whether or not they follow the Curly Girl Method. I freely admit, however, that as a wavy who follows the CGM, that I probably have more information pertaining to those things. I've done my best to be as balanced and informative as possible, but if you see that I'm missing something, please feel free to let me know so I can increase the usefulness of this post for everybody.

So, how did my search for the ideal hair care routine begin?


The process began when I started looking less at the "what" and more at the "why" behind the advice and recommendations I was reading and hearing online. I found myself moving away from product reviews and other people's routines (although both are still great sources of inspiration). I wanted to clear away the mystery around why some products that are amazing for one person can fail spectacularly for someone else, even if they have similar hair. I also wanted to avoid buying into curly hair myths or marketing traps. So, I started looking for information on the science of hair and hair products and resolved to do my homework before buying new products.

The Science-y Hair Blog was (and continues to be) extremely helpful in this pursuit and I cannot recommend it enough. My grades in science classes were hit or miss but luckily, Wendy is great at explaining scientific concepts in a way the layperson can understand. Articles on NaturallyCurly.com are also a great resource. I particularly enjoy articles by Tonya McKay Becker who is, according to the site, "a curly-haired polymer scientist and cosmetic chemist." I don't find her articles QUITE as easy to understand as those on the Science-y Hair Blog but they're very interesting, nonetheless, and chock full of good information.

The ingredients dictionary at TightlyCurly.com is a gold mine of information that helps me to navigate the back labels of all my hair products. I don't treat the ratings (good, okay, caution, and avoid) for each ingredient as gospel, since my hair is different from Teri LaFlesh's, but the awesome thing about her ingredient dictionary is that she always explains what the ingredient does as well as why she is recommending or warning against it. She also quotes scholarly sources when she can which makes my little skeptic heart flutter. While not completely comprehensive, the dictionary lists an enormous number of ingredients and is a fantastic resource for anyone, curly or not, who wants to decipher their product ingredient labels.

Ok, let’s move onto the first step:

Know Thyself


Before we dive into techniques or products, we need to gather information about you. The first thing to think about are your goals and limitations. What are your long term hair goals? Are you looking for length? Are you growing out heat damage? It’s important to keep your goals in mind so you can ensure that your routine is helping you get where you want to be in the long run. Your goal doesn’t have to be complicated, either. My personal long-term goal is simply to maintain the health of my hair.

You also need to think about your daily concerns and preferences for how your hair looks. Do you like clumped curls? Is volume key? What about curl enhancement? Definition? How important is frizz fighting? Some of these aims can work at cross-purposes. For example, the more “clumpy” your curls are, the less volume you’re likely to have, so it’s good to know what your top priorities are. Curl enhancement and definition are the most important factors for me on a day to day basis.

The next thing to ask yourself is how much time and effort you’re willing to put into your wash day routine. Stay realistic about what you think you will actually stick to. Many curlies prefer a wash and go with one styling product. Others devote several hours and multiple products to their first day hair (yeah, that would be me). Some like to keep their hair in protective styles most of the time. Some like to straighten their hair for formal events. Don’t forget to keep your lifestyle in mind when considering how much time you’re willing to spend on wash day. This is especially true if you have work or school early in the day. Don’t plan a morning wash routine that takes 3 hours if you have to leave the house at 6 am...I mean, unless you’re cool getting up at 3 in the morning. You do you; I don’t judge.

I also advocate NOT making yourself miserable for the sake of your hair. Don’t plan on doing your whole shower with your head flipped over then rinsing in ice cold water if it’s going to hurt your back and give you a chill. There will be a way to get results your happy with without tormenting yourself, I promise. I personally refuse to sleep on anything but a cotton pillowcase and I straight up sleep on flannel in the winter (*gasp* I know), despite knowing the benefits of sleeping on a satin or silk pillowcase. Instead, I sleep in a satin bonnet, which prevents tangles and breakage overnight but lets me lay my cheek on soft, cozy cotton. Meanwhile, I have no problem rinsing my hair in cold water or spending extended period of time with my hair flipped upside down. It all comes down to what YOU are comfortable with.

Another BIG factor is the climate you live in. I cannot stress ENOUGH how much living in a very humid or very dry climate can affect your hair routine. Not only is there an effect on how hydrated or frizzy your hair is, different humidity levels can make different ingredients more or less effective or even damaging for your hair (I’ll cover this in more detail later).

Know Thy Hair


The next thing to do is to determine the properties of your hair. The texture typing system we commonly see in the online curl community was actually invented by Andre Walker, Oprah’s hair stylist. This puts hair into one of four categories (1-4) with three subsections within each category (a-c). Type 1 hair is straight, type 2 is wavy, type 3 is curly, and type 4 is coily and kinky curly. It’s usually pretty easy to identify this part of your hair but narrowing down your exact sub-group is trickier and more open to interpretation, especially since the examples you see in the various categories can vary drastically. It’s also important to remember that many people (more as we get into looser curls and waves) have multiple curl types on their head. I generally call myself a 2b wavy but I have the full spectrum of type 2 on my head (and even some straight, type one pieces in the underlayer at the back of my head).

If you’re new to curly hair care, I recommend taking the Texture Quiz at NaturallyCurly.com. Not only will this help you to identify your texture, it will also help you identify your porosity, density, and thickness (which I generally refer to as “width”), and provide a concise introduction to those terms for you. The only thing I don’t love about the quiz is that they guess your porosity based on your habits. My hair is colored and doesn’t take an excessive time to wet in the shower. That led them to conclude I had medium porosity. However, I actually have low porosity. I believe I got an inaccurate result because, while my hair is colored, it's colored with bleach-free dye from Splat which uses micro-pigments rather than peroxide to color the hair (which means less damage, which means the hair isn't made as porous). My hair also isn't very dense which could explain why it doesn't take that long to wet.

My favorite method for quickly estimating your porosity is the slip ‘n’ slide test. You simply pinch a strand of hair and slide it upwards. If it slides smoothly, your hair is lower porosity and if it feels bumpy, your hair is higher porosity. Another indicator is how long it takes for your hair to dry. For my hair, this is the biggest sign that my porosity is low. I didn't realize how long it took for my hair to dry until I was at the salon under a hooded dryer (my stylist noted how much longer than expected it was taking). I’m not a big fan of the float test to determine porosity because water tension or product in the hair can give you a misleading result. For more information on determining your porosity, check out this post from the Science-y Hair Blog.

Another (more expensive) option is to get a Deva Cut or Transformation Service. A Deva Cut is a hair cutting technique especially for wavy, curly, coily, and kinky hair. Deva Cuts include cleansing and styling, which they call the “transformation service.” If you don’t want a haircut, most Deva stylists offer the transformation service a la carte. A good Deva stylist should be able to help you identify your texture, porosity, density, and width as well as give you some guidance about caring for it. You can find a Deva stylist here.

If you want to know, FOR SURE, gosh darn it, what your porosity and width are, consider ordering a hair analysis by GoosefootPrints. It’s the side business of the author of The Science-y Hair Blog. There is a waiting list but she’s recently added the requirement of a $5 deposit to get on it. I personally prefer this because it means people are less likely to get on the waitlist without following through, extending the wait for others. There are three price levels, depending on whether you want photos and/or product recommendations. The “measurement only analysis” only costs $18 and is definitely something I hope to get done at some point.

And don’t forget about your scalp! Your scalp concerns will definitely factor into the techniques and products you choose. Is it dry and flaky? Oily? Do you have dandruff or another skin condition? Healthy hair starts at the scalp and you want to make sure you’re meeting its needs too.

Finally, look the knowledge you can glean from your existing routine. How long does it take for your hair to feel greasy (if it ever does)? Is there another way your hair lets you know it’s time to wash it? If your hair feels weighed down sometimes for seemingly no reason you may be dealing with build-up. Sometimes build-up is visible as tiny white flakes or balls (not to be confused with dry scalp flakes). If you experience build-up, how quickly does it form? Look at the ingredients of your favorite products to see if there’s overlap; that might be an ingredient your hair loves that you should look for in other products. Have you tried products with protein? How did your hair react? Taking note of observations like this can help you out later on when we’re looking at techniques, ingredients, and products.

I think that’s a good place to wrap up this installment. The next post in this series will be all about choosing the best techniques-- cleansing, styling, drying, and more-- for your best routine.

Review: Jessicurl Spiralicious Styling Gel

I recently learned that the Jessicurl website offers free shipping on orders of $15 or more on the 15th of every month. There are multiple p...